Unlocking Market Insights: Volume Profile vs Traditional Volume in Institutional Trading Zones
Image source: Volume Profile Strategies for Institutional-Level Entries
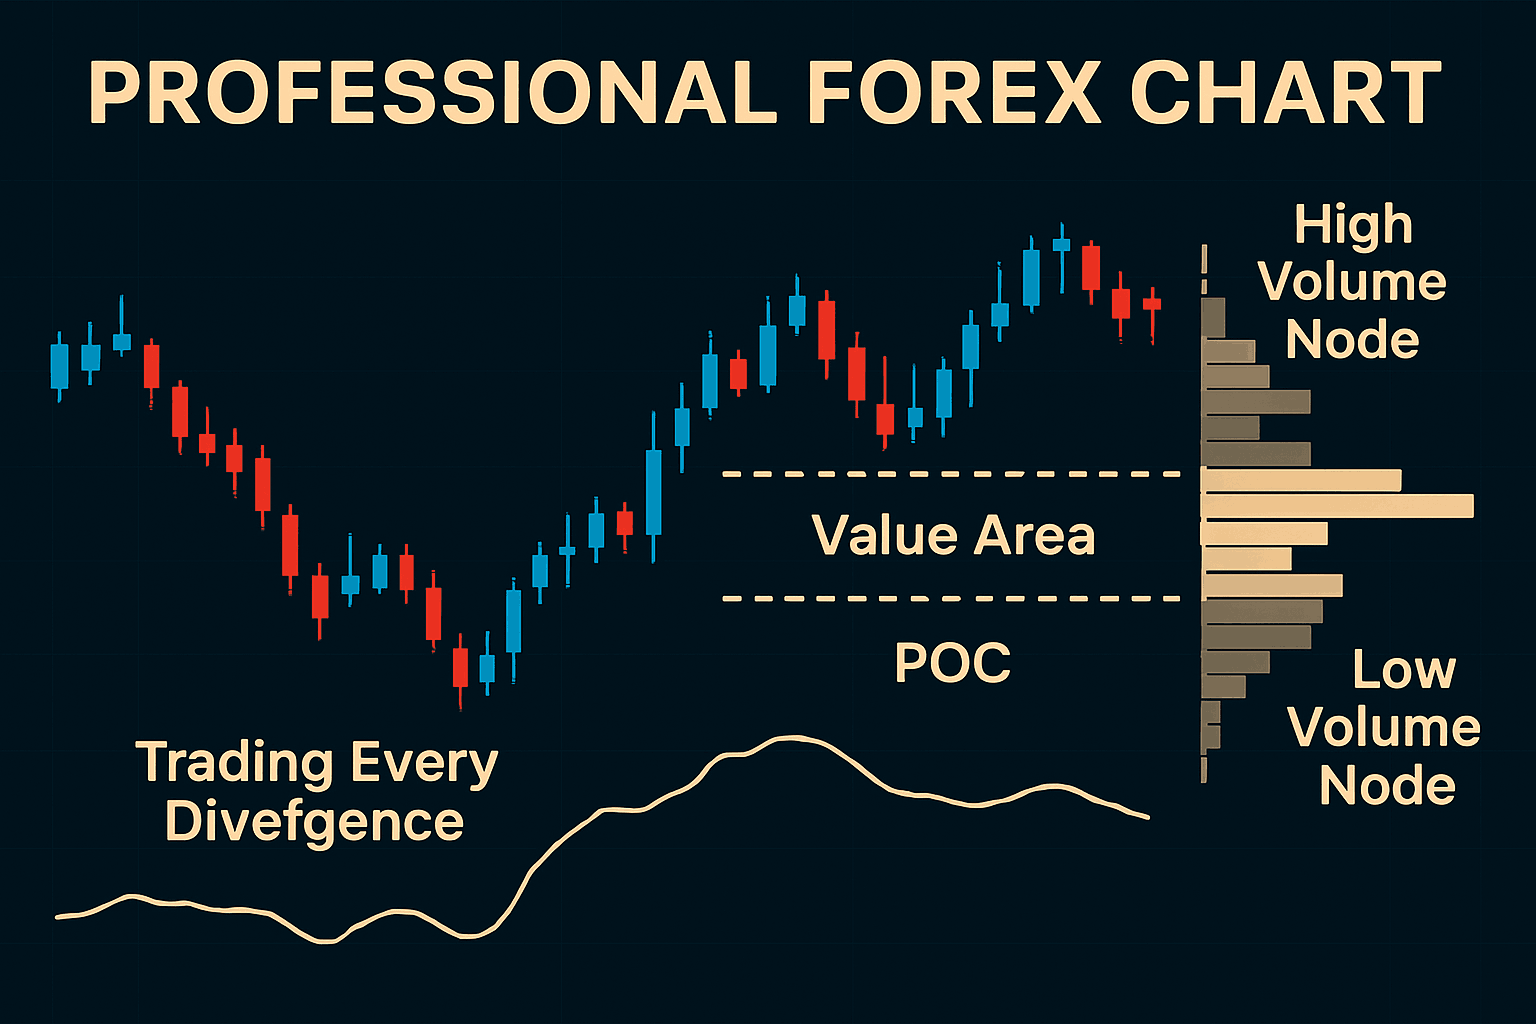
Short answer: Volume Profile shows where (price levels) trading interest concentrated, revealing institutional zones (POC, Value Area, HVNs/LVNs); traditional (bar) volume shows when volume occurred and is less precise for locating institutional entry/exit zones. 1, 2
Why Volume Profile finds institutional zones (2 sentences)
- Volume Profile aggregates traded volume by price, so peaks (High Volume Nodes) and the Point of Control mark price levels where large counterparties accumulated or distributed positions; these areas often act as institutional support/resistance. 3, 1
- Low Volume Nodes mark rapid price discovery or gaps where liquidity is thin—ideal breakout corridors that institutions use to move price with less slippage. 1, 3
How traditional volume differs (2 sentences)
- Traditional vertical bar volume tells you the size of activity inside a time slice (a candle), which helps confirm momentum or exhaustion but doesn’t show which price levels absorbed that volume. 2, 4
- Because institutions care more about executed size at specific prices (to manage fills and exposure), time-based volume is a poorer tool to map their footprint than price-based volume profile. 5, 3
Practical steps to find institutional zones (3 bullets)
- Draw a Fixed-Range Volume Profile across a swing or consolidation to locate the POC and Value Area (70% volume) — treat POC as fair value and VA boundaries as institutional decision zones. 6, 1
- Mark HVNs as likely targets or congestion (expect slow price action) and LVNs as potential fast-move corridors for breakouts or stop runs. 3, 1
- Combine profile zones with market structure (swing highs/lows, trendlines) and order-flow tools (footprint/delta) when available to confirm institutional interest before entering. 6, 3
Common setups that indicate institutional activity (3 bullets)
- Value Area Rejection: price steps outside VA (e.g., above VAH) and is rejected back into VA — signals institutional sellers defending value. 1, 3
- Acceptance Outside Value with rising volume at price levels beyond VA — signals new institutional value and possible trend continuation. 7, 3
- POC Rotation: price repeatedly revisits/rotates around the POC without breaking structure — suggests accumulation/distribution by large players. 7, 3
Illustration of the mechanism (Mermaid)
 Each arrow shows how traded volume by price creates nodes that shape subsequent price behaviour. 3, 1
Example (short)
- On a 4H EURUSD swing, draw FRVP across the prior move: POC at 1.0800, VA 1.0770–1.0830, LVN at 1.0855; if price breaks above 1.0830 with low traded volume at the LVN then slices to 1.0900, that LVN acted as a fast path used by institutions — trade with structure and volume confirmation. 7, 3
Quick checklist before trading a profile zone (3 bullets)
- Is the zone formed on a liquid timeframe/instrument? Prefer majors and session-profile types. 6, 3
- Does price structure support the directional thesis (higher highs/lows, or clear break/retest)? Use profile to confirm, not replace structure. 2, 3
- Do you see matching order-flow signals (increasing volume at price, footprint delta) when price interacts with the zone? If not, be cautious. 3, 7
If you want, I can:
- Walk through a specific chart (send a screenshot or symbol/timeframe) and mark POC/HVNs/LVNs and proposed entries; or
- Produce a short TradingView-style step-by-step setup you can copy into your platform.
Which would you prefer?
References
-
️ The Invisible Indicator: Why Institutions Love Volume Profile
-
Volume Profile vs Regular Bar Volume : r/Daytrading - Reddit
-
How to use Volume Profile in trading | Technical Analysis - Oanda
-
Understanding Market Profile and Volume - Trader Algorítmico
-
Volume Profile Mastery: The 3-Step Framework to Spot Institutional …
-
Stop Confusing Volume Profile, Market Profile, and Volume Indicators
-
Chapter 8: Volume Profile — Reading the Institutional Map | The …
-
How to MASTER Volume Profile Trading in Less Than 15 Minutes And Never GUESS Market Direction Again
-
Volume Profile Analysis 2026: How Institutional Traders Read Volume
-
Volume Profile Trading Strategies: Key Levels & Trade Setups